Strawberry Rhubarb Muffins (with Coconut Flour)

It’s Sunday. Sunday means getting ready for the new week and for us, it means getting snacks prepared to put into school lunches. I like trying out different treats for the kids but I like to stick to what I’ve got on hand. Earlier this summer I got my hands on a whole slew of rhubarb and I froze the majority of it. The kids haven’t been inundated by rhubarb-y treats so this week they get strawberry rhubarb muffins.
First up, melt together the honey and coconut oil in a large bowl. Note the nifty separation of the coconut oil and honey!
Whisk in the eggs and the vanilla.
In a fine mesh sieve, sift 1/2 a cup of coconut flour. Spoon it back into a 1/2 cup measuring cup and level it off with a knife. Why is this step important? Coconut flour is a moisture absorber. A packed 1/2 cup of coconut flour contains more flour than a sifted/levelled 1/2 cup.
Stir the baking powder and salt into the coconut flour. Pour the dry mixture into the wet mixture and whisk well.
Finely chop the rhubarb and the strawberries…
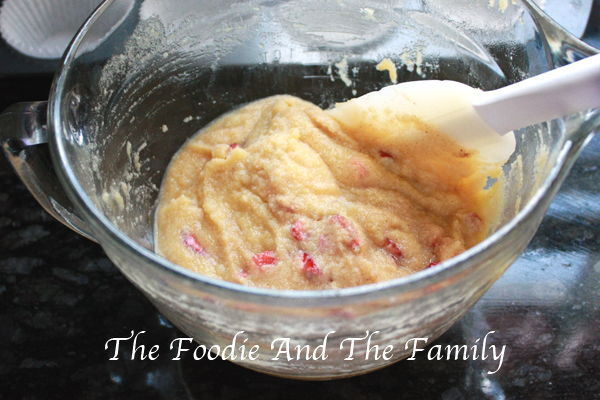
..and fold them into the batter.
Scoop 1/4 cup of batter into each lined muffin cup.
Bake at 350 degrees for 20 minutes. Cool in the pan for 5 minutes before removing to cool completely on a cooling rack. We pack them individually and freeze for quick lunch preparation.
Strawberry Rhubarb Muffins

Ingredients

1/4 cup honey
6 eggs
2 teaspoons vanilla
1/2 teaspoon baking powder
1/2 teaspoon salt
1/4 teaspoon cinnamon
1/2 cup finely chopped rhubarb
1/2 cup finely chopped strawberries
Directions

Preheat oven to 350 degrees.
In a large bowl, melt together coconut oil and honey. Whisk in eggs and vanilla.
In a medium bowl, sift the coconut flour and re-measure. Stir together coconut flour, baking powder, salt, and cinnamon. Add dry ingredients to the wet ingredients and whisk until well combined. Gently fold in rhubarb and strawberries.
Line a muffin pan with 12 liners (or oil the pan very well with coconut oil). Pour 1/4 cup of batter per cup. Bake for 20 minutes, or until a toothpick inserted into center comes out clean. Cool, in the pan, for 5 minutes. Remove to a cooling rack to cool completely.

Bacon Wrapped Meatloaf

Yes, more bacon. I just finished our menu plan for this week and had to scribble out a meal because I had scheduled 3 bacon meals in one day. My oldest used to despise bacon… I wasn’t entirely sure that he was mine during his “hate bacon” phase. Now we fight over the bacon. 
Beautifully cooked bacon that tastes like meatloaf and meatloaf that tastes like bacon. Because I’m always curious about what people serve as sides, I’ll tell you that we had steamed carrots, caramelized onions, and sauteed beets.

Lay the bacon out on a cookie sheet. Overlap the pieces slightly.

Get your ground beef into a large bowl.
Finely chop the onions. Or not finely…whatever you want. Someone needs to buy me a pair of onion goggles if I’m going to be the one chopping these onions!
Add the onions to the bowl along with garlic, egg, and tomato paste.

Next, add the almond meal and spices. You might think that adding nutmeg is weird. Well, it is weird….but add it anyway. It’s only a pinch and I promise it won’t taste funky! 

On a piece of parchment paper, form the meat mixture into a loaf. It should be about the same length as the bacon so that there’s no bacon-less meatloaf. 

See? The ends of my loaf are without bacon! The horror!! Center the loaf on top of the bacon, fold the bacon over the loaf, and turn over so the ends of the bacon are under the loaf.

Cook that bad boy in a 400 degree oven for an hour (or so). Your house will smell unbelievably delicious. You might end up with extra guests for supper if you cook it with your windows open. You’ve been warned. Let it sit for 5 minutes (if you can wait that long) before you cut it. 


Bacon Wrapped Meatloaf


Ingredients


1 pound bacon
2 pounds ground beef
1/2 onion, finely chopped
2 teaspoons minced garlic
1 egg
3 heaping tablespoons tomato paste
1/2 cup almond meal
2 teaspoons oregano
1 teaspoon salt
1/2 teaspoon rosemary
1/2 teaspoon thyme
1/4 teaspoon pepper
pinch red pepper flakes
pinch nutmeg

Directions

Preheat oven to 400 degrees. Lay bacon on a cookie sheet, overlapping slightly.

In a large bowl, combine all remaining ingredients. On a piece of parchment paper, shape the beef mixture into a loaf approximately 14″ long (or long enough to be the same length as the bacon all laid out). Carefully turn the loaf, centered, onto the bacon. Fold the ends of the bacon over the loaf and roll the entire thing over so that the bacon ends are down.

Cook for 60-70 minutes, or until cooked through. Let it sit for 5 minutes before cutting.

Roasted Chicken Legs with Bacon Veggies

I’m trying something a little different for this post. Lots of pictures which means it took twice as long to actually make this meal but it also means that you don’t have to read 3 paragraphs of our family’s antics before getting to the good stuff. Hit me up in the comments and let me know what you think!
We are firm believers in the theory that “Bacon makes everything taste good”. I’ve made roasted chicken and veggies before but it’s been bland. Bacon to the rescue!! This meal is very easy on the primal pocket book…total cost was under $20 (including a sauteed swiss chard on the side) to feed a family of 7. If you’re not a family of 7 then you’ll have plenty of leftovers!
First, cut the carrots into even pieces and then slice them lengthwise. If you love carrots, feel free to add a few extras in there. 

Halve the onion and slice it into even strips. If you’re lucky enough to get a juicy onion like me, keep the tissues handy. *sniff sniff*

Use a garlic press to crush the garlic. Check out the size of this garlic that I found at the farmers market! I had to halve them just to get them into the garlic press! And boy, were they strong smelling fellas!

Cut the cauliflower into large pieces. If you cut them too small, you will end up with mushy cauliflower. Mushy cauliflower is only delicious when it’s supposed to be mushy. 

Ahhh…the money shot…BACON! Cut the bacon into pieces. I considered frying it before putting it into the dish but there’s no physical way for me to resist cooked bacon. 

Toss all of the vegetables and sweet, sweet bacon into a large roasting pan. My roasting pan is capable of holding a gigantic turkey (just to give you an idea as to how big a pan you’ll need). Pour the olive oil over top and sprinkle the seasoning over top. Mix it up well.

Lay the chicken legs over the vegetables and sprinkle with the remaining seasonings. Those legs are ready to hit the oven! Stick them into the 400 degree oven and do your thing.

50-60 minutes later…delicious browned chicken legs with veggies that taste like bacon! I should warn you that there may not be leftovers. 


Roasted Chicken Legs with Bacon Veggies


Ingredients


5 large carrots, sliced into sticks
1 large onion, halved and sliced
2 cloves garlic, crushed
1 head cauliflower, cut into large chunks
1/2 pound bacon, cut into pieces
2 tablespoons olive oil
2 teaspoons salt, divided
1 teaspoon pepper, divided
1 tablespoon Italian seasoning, divided
5 large chicken legs

Directions

Preheat oven to 400 degrees.

Slice the carrots into evenly sized sticks. Halve and slice the onion. Using a garlic press, crush the garlic cloves. Cut the cauliflower into large chunks. Combine all vegetables into a large roasting pan. Mix in chopped bacon. Pour 2 tablespoons of olive oil over the mixture and top with 1 teaspoon salt, 1/2 teaspoon pepper, and 1/2 tablespoon Italian seasoning. Mix well.

Lay the chicken legs on top of the vegetables. Sprinkle the chicken with remaining 1 teaspoon salt, 1/2 teaspoon pepper, and 1/2 tablespoon Italian seasoning. Cover and roast for 50-60 minutes, until the chicken is cooked through and the vegetables are tender.

Zucchini Fettuccine Alfredo

I am so glad that we have made a routine of going to the farmer’s market on Saturdays. The kids know we’ll be getting up early (on a Saturday! The horror!!!) and they look forward to it. My husband is the designated stroller pusher and he gets frustrated EVERY Saturday because, while I swoop through the crowds, he is trapped behind the slow walkers. They meander, mostly in the center of the aisles, without any concern for the people behind them.
My job is the shopper. I hold the list, I touch the vegetables, and I wait for my husband to pay for it all. We’ve discussed leaving the stroller at home and putting the baby into a carrier but we usually end up with 6 bags full of vegetables that neither of us wants to carry around.
The ‘in’ thing at the market lately is gigantic vegetables. Cabbage that weighs more than the baby, beets the size of a newborn’s head, and zucchini as tall as my preschooler! We’ve considered buying some of the gigantic novelty produce but no one is willing to prepare (or eat) that much cabbage. We have bought a few vegetables this year without knowing what they are or how to prepare them. I think it keeps things more interesting. Using yellow zucchini versus our usual green zucchini made this meal a little more exciting to the kids. Or it could be the cream sauce… you never know with kids. 
Zucchini Fettuccine Alfredo

Ingredients
2-4 large zucchini
4 chicken breasts, grilled and sliced
1/2 cup butter
3 teaspoons minced garlic
2 cups heavy cream
2 ounces soft goat cheese
salt and pepper, to taste
Directions

Cut zucchini lengthwise and scoop out the seeds. Slice each half into fettuccine thick strips and set aside. Bring a large pot of water to a boil.
In a medium sized pot over medium heat, melt butter. Add garlic and saute for 2-3 minutes (do not let the garlic burn). Whisk in the cream and heat until it’s almost boiling. Reduce heat and simmer for 10 minutes. Stir in goat cheese, salt, and pepper and continue to simmer until it thickens.
Add zucchini noodles to boiling water and cook for 4-5 minutes, until the zucchini is just tender. Strain really well and serve topped with cream sauce and chicken slices. 

Honey Garlic Barbecue Sauce

3 days into the Whole 30 Challenge and I feel okay. Not great, not bad…just okay. I’m regretting my timing on this challenge because it coincided with the first day of school. I have forgotten how exhausting this routine is… get up early, shower, enjoy a quick moment of silence before waking up the clan, making breakfast, packing up lunches, rushing out the door, … The only difference is that, this year, the 3 boys are in school full time. 
I admit that dropping off my 3rd child for his first day of Grade 1 was tough. I cried. I asked if he would prefer to just stay home with me forever. I offered him chocolates if he would…and he said “No way..chocolate would make me sick!”. It was a very lonely day without him.
Their going back to school just solidifies the fact that summer is over. I know plenty of people who barbecue in the winter but it just doesn’t feel right to me. Having to shovel a path through 3 feet of snow… *blah* We’re enjoying the last couple of weeks with our barbecue and now that I’ve figured out how to make my own barbecue sauce, I can enjoy it even more! Dry ribs are fine, but saucy ribs are superb! 
Honey Garlic Barbecue Sauce

Ingredients

1 tablespoon olive oil
1 large onion, finely chopped
3 tablespoons minced garlic
3 tablespoons honey
5 1/2 oz can tomato paste
1 cup beef broth
1/2 teaspoon mustard powder
2 tablespoons cider vinegar
salt and pepper, to taste
1/4 teaspoon worcestershire sauce
pinch cayenne pepper
Directions

In a medium sized pot, over medium-high heat, heat olive oil. Saute the onions and garlic for 5-7 minutes, until the onions are softened and opaque. Reduce heat to medium and stir in honey and tomato paste until the honey is runny. Stir in beef broth, mustard powder, cider vinegar, salt, pepper, worcestershire sauce, and cayenne pepper. Bring to a boil and reduce heat to low.
Simmer over low for 20-30 minutes, until the sauce thickens (to your liking). Use immediately or refrigerate for up to 1 week. 

Coleslaw

There is at least one person in your life whose life appears absolutely perfect. Perfect house, perfect family, perfect life… They manage to juggle it all flawlessly and you can’t imagine them EVER having a bad day.
I’m here to tell you… that is not me. I’ve been called Super Mom enough times that I considered having it embroidered on a shirt but it isn’t my reality. My house has a lot of clutter, my laundry can go days without being put away, my kids can be unruly brats, and I yell FAR too much to be considered a super mom.
From the outside, it appears that I juggle a lot flawlessly but the stress and guilt I feel over not being able to do more eats at me. I push deadlines to the very bitter end and then rush to get things finished. I’m an ideas person, not a ‘getting $h*t done’ person. The reason I appear to be super is because I married someone who truly IS super. My husband works full time, has no problem taking all 5 kids to Costco by himself, does a tremendous amount of housework (yes, I am THAT lucky!), and he helps cook a lot of our suppers. 
There you have it..this Super Mom is married to a Super Dad and I could never make it through my crazy days without him. 


Coleslaw


Ingredients


4 cups shredded green cabbage
2 cups shredded purple cabbage
2 large carrots, shredded
1 apple, shredded (we used Gala)

1/4 cup apple cider vinegar
2/3 cup coconut milk
1/2 cup olive oil
salt and pepper to taste
1 tablespoon celery seed

Directions


In a large bowl, mix together green cabbage, purple cabbage, carrots, and apple. Set aside.

In a medium bowl, whisk together apple cider vinegar and coconut milk. While whisking, pouring in olive oil in a steady stream and continue whisking until it’s combined well. Season with salt and pepper. Pour dressing over the cabbage and mix well. Top the coleslaw with the celery seed and refrigerate for at least 1 hour.

Grain-Free Blueberry Muffins

Where did summer go?? My kids are 2 days away from starting school again and I realized that we didn’t do half of the things we had planned to do. We didn’t go to the beach. We didn’t go to the waterslides. We didn’t go berry picking. We spent half of the summer holiday as a half a family with the older boys visiting their grandparents.
As focused as I was in June, I feel like my focus did a 180 and now it’s time to get back on track. I will be spending the month of September doing the Whole 30 challenge. This means no dairy, no coffee (because of the no dairy), no wine, no honey or maple syrup, … on top of already cutting out grains, refined sugar, legumes, and processed foods. 
During September I will also be issuing myself some personal and fitness challenges. The personal challenges will be shared on my Facebook page so please come on over and join in if you’d like! The fitness challenges are pretty simple…bike 300 km, do 3000 push ups, and do 4 1/2 hours of planks. Okay, that looks more intimidating once I’ve typed it. 
Time is a major factor in all of this. I don’t have a lot of time to spend working out so I have to focus on things that I can do with my kids. This is exactly how things work in the kitchen as well. I cook things that the kids can help make and these muffins have a task for everyone. Someone can stir, someone can break the eggs, someone can pour the blueberries, and someone can line the muffin cups. They don’t last long but they are fast and delicious!


Grain-Free Blueberry Muffins


Ingredients


2 1/2 cups almond meal
3 eggs
1/4 cup honey
1/2 teaspoon baking powder
1/2 teaspoon sea salt
1 tablespoon vanilla
1 cup blueberries

Directions


Preheat oven to 300°. Line 12 muffin cups with muffin liners (or grease each cup well with coconut oil).

In a large bowl, whisk together everything but the blueberries until fully combined. Gently fold in the blueberries to incorporate.

Fill each liner 3/4 full with batter and bake for 30-40 minutes. The top should be spongey but firm when pressed and your finger should not go through into the muffin. Cool for 5 minutes and remove from muffin pans.

*This recipe was given to me by a friend. If you know where it comes from, please e-mail me so that I can give credit to the recipe creator*

Fajita Chicken Salad

I had an entirely different post typed up and decided, at the last minute, to switch it up. Earlier today I noticed that my Facebook page had 476 ‘likes’. My goal was to hit 500 by September…something that seemed rather unreasonable since we have just days left in September and I don’t typically get more than a couple of likes per day. I posted my goal and immediately noticed that Connie’s Finally Losing It posted it on her page. Then Fast Paleo posted it and Bellatrix Nutrition and a couple of friends. 
I went to shower and by the time I came back to the computer (less than an hour later), the page had hit 500…and counting…. At this moment, there are 63 new likes JUST from today and I realized that I set my goal WAY too low. This is something I’m used to doing in real life as well… if I set my goals low enough, surely they will be attainable….right??? 
But that’s NOT right. If I just lose a couple of pounds, I will do/buy/eat _______. I never lost the couple of pounds but I would still do/buy/eat ________. When I switched to a primal diet, I did it for my health but I never expected to lose weight as quickly as I did. As I lost weight, I started setting goal weights and rewards…functional rewards. At 15 pounds (pre-Anya weight), I had my hair cut and coloured. At 20 pounds (pre-Gavin weight), I got sized for new bras (which, after being in nursing bras for over 10 years, was a real treat).
I have nothing planned for pre-Adam weight (5 pounds away)…I should probably get on that because September begins a 30 day challenge…


Fajita Chicken Salad


Ingredients


1 cup salsa (medium is what we use)
1/4 cup chicken broth
1 tablespoon chili powder
1/2 teaspoon salt
1/2 tablespoon paprika
2 teaspoons minced garlic
1 teaspoon onion powder
1/4 teaspoon cumin
1/8 teaspoon cayenne pepper
pinch red pepper flakes
1/2 cup olive oil (divided)
2 limes, juiced (divided)
12 boneless, skinless chicken thighs
2 heads romaine lettuce, chopped into bite sized pieces
1 each red, yellow, & orange pepper, cut into strips
1 large onion, halved and sliced
additional olive oil to cook chicken and vegetables.

Directions


In a large bowl, stir together salsa, chicken broth, chili powder, salt, paprika, garlic, onion powder, cumin, cayenne pepper, red pepper flakes, 1/4 cup olive oil, and juice from 1 lime. Reserve 1/4 cup of this mixture. Add the chicken thighs to the bowl and stir around to coat. Marinate in the refrigerator for at least 1 hour (and up to 24 hours).

Heat a bit of olive oil in a large frying pan over medium-high heat. Cook the chicken thighs (in batches, if necessary) for 5-7 minutes per side, until cooked through. Remove from pan, cut into strips, and keep warm.

Wipe pan clean and add more olive oil. Saute peppers and onion for 5 minutes, until softened but still slightly crisp.

Whisk the reserved 1/4 cup of marinade with 1/4 cup olive oil and juice from 1 lime in a small bowl. In a large serving bowl, layer romaine lettuce, sauteed vegetables, and sliced chicken. Top with dressing and serve.

Chicken Parmesan

5 kids = a calendar full of appointments, important dates, notes, things that I cannot forget. I rely very heavily on the calendar that we have on the fridge to keep my days straight and I write things onto it immediately.
The problem is, I occasionally try to outsmart the calendar. Gavin had a birthday party last Saturday at 1pm. We bought the card, we picked up the gift, and we had him there 10 minutes early. I thought it was strange that no one else was there but I waited…and waited… and finally I went to ask if there was actually a party that day for Gavin’s friend. It kind of sucked trying to explain to my 6 year old that Mommy brought him to the birthday party on the wrong day.
 When we got home, there was the birthday party written on the calendar….next Saturday. Had I taken the time to look, I would have saved myself the embarrassment but as it is, I’ve realized how important that calendar actually is. I also write down what we’re going to be eating every day.. this saves me from throwing out things I had planned to use and it also means my husband can get things started if I am busy.


Chicken Parmesan

Ingredients

1/2 cup packed parmesan cheese
6 boneless, skinless chicken breasts
salt & pepper, to taste
1/2 sauce recipe, to follow
1-2 cups shredded mozzarella cheese
Sauce:
680mL tomato sauce
1 bay leaf
1/4 teaspoon dried thyme
1 teaspoon dried oregano
2 teaspoons dried basil
pinch red pepper flakes
salt and pepper
1/2 teaspoon garlic powder
1/2 teaspoon onion powder
Directions

Preheat oven to 400°F. Flatten each chicken breasts with a mallet, one at a time, between 2 pieces of plastic wrap. Sprinkle with salt and pepper and place into a 9×13″ baking pan. Sprinkle the top of the chicken with all of the parmesan cheese. Bake for 20-30 minutes, until the chicken is almost cooked through.

While chicken is cooking, prepare the sauce. Combine all sauce ingredients in a pot and bring to a boil over medium heat. Reduce heat and simmer for 15-20 minutes. Remove the bay leaf.

Spread 1/2 of the tomato sauce over the chicken and top with 1-2 cups of mozzarella cheese. Bake for another 15-20 minutes, until the cheese is bubbly and browned. Serve over spaghetti squash, if you love it as much as we do.

Roasted Red Pepper Soup with Mini Meatballs

Today was hot…too hot for soup so it’s a good thing I made this a couple of weeks ago when we were getting some cooler weather. We got up early to head down to the farmer’s market, much to the delight of my 3 year old. Our plan was to pick up our vegetables for next week and then walk down to Cool Beans Bus for a morning coffee for the adults/smoothie for the little people. Anya was most excited about this morning’s plans…yelling “Cool Beans Bus! I am SO EXCITED!”.
Being able to focus more one on one with them (or two on three…) has been cool. Gavin has been enthusiastic about everything..stating how he’s having his best day ever. Oh wait, he seriously dislikes riding bikes with me but that’s easily fixed by playing Webkinz with him. Tomorrow we are going to take them to the mountains and it could, very easily, be the best day ever for him.
To see Gavin now, you would never know how difficult it was to get him to eat a couple of years ago. It was a constant battle to convince him to eat a couple of bites and he was painfully thin. Now, he’ll eat anything and has been known to finish meals first. He is the one that doesn’t cringe when we tell him what’s in the food we’ve made and will actually ask for things that have been deemed ‘gross’ by his brothers. 
Roasted Red Pepper Soup with Mini Meatballs

Ingredients

4 large red peppers
3 large tomatoes
1 tablespoon olive oil
1 large onion
2 carrots
3 teaspoons garlic
6 cups beef broth
pinch red pepper flakes
1 pound ground beef
1/4 onion, finely chopped
1/2 teaspoon smoked paprika
1/4 cup almond meal
1 egg
salt and pepper, to taste
Directions

Preheat broiler and raise rack to top 1/3 of the oven. Place red peppers and tomatoes, whole, onto a baking sheet and broil for 10 minutes. Flip and broil for another 10-15 minutes, until the peppers are blackened and the tomato skin comes off easily. Remove from oven and cool until you can handle them.
In a large pot, heat olive oil over medium-high. Saute onions, garlic, and carrots until onions are softened, 5-7 minutes. Stir in beef broth and red pepper flakes. Bring to a boil, reduce heat, and simmer for 15-20 minutes. The carrots should be very tender.
Remove peel and seeds from red peppers and tomatoes. Chop into bite sized pieces and stir into the pot. Using an immersion blender (or food processor), puree the soup until it is nearly smooth. Continue to simmer while you prepare the meatballs.
In a medium sized bowl, combine ground beef, finely chopped onion, smoked paprika, almond meal, egg, salt, and pepper. Roll into 48 teaspoon sized meatballs. With the soup simmering, drop the meatballs, one at a time, into the pot. Allow to simmer, without stirring, until the meatballs are cooked through. (7-10 minutes) 
Serve topped with a sprinkle of smoked paprika.